
Florida Weather Can Be Tough on Your Outdoor Surfaces
If you’ve spent time investing in your outdoor space, you already know how much a well-designed driveway, patio, or pool deck can elevate your home. But in places like Bradenton, the climate doesn’t always play nice with those surfaces.
Between intense sun exposure, frequent rain, high humidity, and coastal salt air, your pavers are constantly being tested. Over time, this combination can cause colours to fade, surfaces to wear down, and stains to set in more easily. That beautiful finish you started with can slowly lose its impact.
Homeowners across Sarasota and Venice see similar challenges. Pool decks develop dull patches. Driveways begin to show uneven tones. Patios start to feel less polished and more weathered.
This is exactly where sealing makes a real difference.
At Manasota Flooring, outdoor surfaces aren’t just about function—they’re about creating spaces that feel inviting, durable, and easy to maintain. Sealing your pavers isn’t an extra step; it’s part of protecting that investment so it continues to look and perform the way you expect.
What Paver Sealing Really Does for Your Home
Paver sealing is often misunderstood as purely cosmetic, but it actually plays a much bigger role in protecting and preserving your outdoor surfaces.
What Is Paver Sealing?
In simple terms, sealing involves applying a protective layer over your pavers. This layer acts as a barrier between your surface and the elements—helping prevent moisture, dirt, and stains from penetrating the material.
Think of it as giving your pavers a shield that keeps them looking better for longer.
Key Benefits You’ll Notice
Sealing delivers a range of benefits that go beyond appearance:
Enhanced colour and finish – Sealed pavers often look richer and more vibrant
Protection from stains – Oil, food, and organic debris are easier to clean
Moisture resistance – Helps prevent water from soaking in and weakening the surface
Reduced weed growth – Keeps joints more stable and less prone to intrusion
Improved durability – Helps your pavers stand up to everyday wear
In Florida’s climate, these benefits aren’t just nice to have—they make a noticeable difference in how your outdoor space holds up over time.
Signs Your Pavers May Need Sealing
Not sure whether your pavers are due for sealing? There are a few clear signs that can help you decide.
Visual Clues to Look For
One of the easiest ways to tell is by looking at the surface:
Colours appear faded or washed out
Stains are more noticeable and harder to remove
Joint sand seems to be disappearing
The surface looks uneven or worn
These changes often happen gradually, so it’s easy to overlook them until they become more obvious.
Performance Changes You Might Notice
There are also functional signs:
Water absorbs quickly instead of beading on the surface
Weeds or moss begin appearing between joints
Cleaning takes more effort than it used to
If any of these sound familiar, sealing could help restore both the look and performance of your pavers.
The Best Time to Seal Pavers in Bradenton
Timing plays a big role in how effective sealing will be.
Ideal Conditions for Sealing
Sealing works best when the weather is:
Dry
Mild in temperature
Free from heavy humidity where possible
This helps the sealer bond properly and cure evenly.
Why Spring Is a Smart Choice
Spring is one of the most practical times to seal pavers in Florida. It prepares your surfaces ahead of the heavy rains and storms that typically arrive in the summer months.
By sealing early, you’re giving your outdoor areas an added layer of protection before they face the toughest conditions of the year.
How Often Should You Seal?
Most homeowners find that resealing every two to three years keeps their pavers in great shape. However, this can vary depending on:
Sun exposure
Foot and vehicle traffic
Proximity to coastal conditions
Keeping an eye on how your surfaces look and perform will help you decide when it’s time.
How the Paver Sealing Process Works
Understanding the process can help you appreciate why proper sealing delivers better results.
Step 1: Cleaning the Surface
The first step involves removing dirt, debris, and stains. This often includes pressure washing to create a clean base.
Step 2: Preparing the Area
Any necessary repairs are handled at this stage. That might include re-leveling sections or replacing joint sand to stabilise the surface.
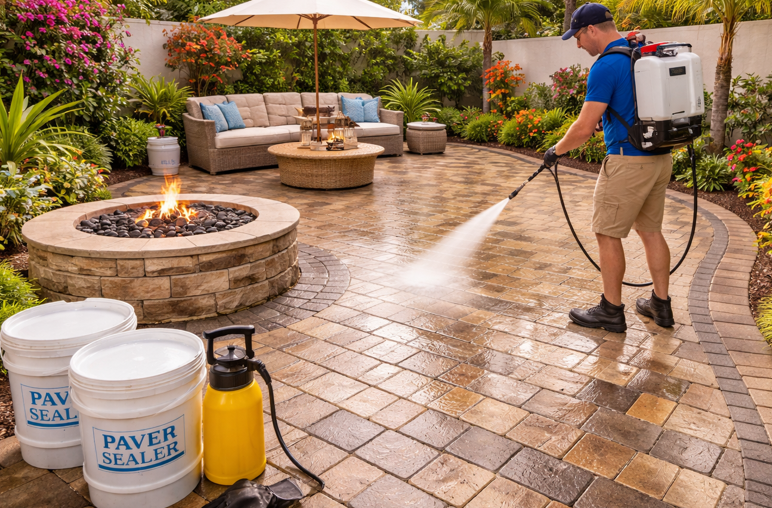
Step 3: Applying the Sealer
The sealer is applied evenly across the surface. Depending on your preference, this can create a natural finish or a slightly enhanced look.
Step 4: Allowing Proper Curing
Once applied, the sealer needs time to dry and cure. During this period, it’s important to keep the area clear of traffic to ensure the best outcome.
Each step plays a role in ensuring your pavers not only look great but continue to perform well over time.
DIY or Professional Sealing: What’s Right for You?
When it comes to sealing pavers, homeowners often weigh up whether to handle it themselves or bring in professionals.
DIY Sealing
Taking a DIY approach can feel appealing if you enjoy hands-on projects. It gives you control over the process and timing.
However, it also requires:
The right equipment
Careful preparation
Attention to detail
Even small inconsistencies in application can affect the final result.
Professional Sealing
Working with professionals offers a more streamlined experience. You benefit from:
Consistent application
High-quality materials
Efficient turnaround
For many homeowners, the convenience and reliability of professional work make it a worthwhile choice.
If you’re exploring options, learning more about pavers in Florida can help you better understand how different materials and finishes perform in local conditions.
Common Mistakes to Avoid When Sealing Pavers
Even with the best intentions, a few common mistakes can affect the outcome.
Skipping Proper Cleaning
Applying sealer over dirt or stains can trap imperfections beneath the surface.
Applying Too Much Sealer
A heavy application doesn’t mean better protection. It can lead to uneven finishes or a sticky surface.
Sealing in the Wrong Conditions
Humidity and rain can interfere with how the sealer sets, reducing its effectiveness.
Overlooking Joint Sand
Neglecting the joints can lead to instability and increased weed growth.
Avoiding these pitfalls helps ensure your pavers look and perform the way they should.
The Difference Sealing Makes to Your Outdoor Space
Sealing isn’t just about protection—it also enhances how your space looks and feels.
A Noticeable Visual Upgrade
Sealed pavers tend to have a richer, more defined appearance. Colours stand out more, and the overall surface looks cleaner and more polished.
Easier Maintenance
With a protective layer in place, cleaning becomes much simpler. Spills and debris don’t cling as easily, making routine care more manageable.
A More Inviting Space
Whether you’re hosting guests or simply enjoying your outdoor area, sealed pavers contribute to a space that feels well-maintained and welcoming.
Simple Ways to Keep Your Pavers Looking Great
Once your pavers are sealed, a little ongoing care can go a long way.
Sweep regularly to remove debris
Clean spills promptly
Check for early signs of wear
Plan for resealing when needed
These small steps help preserve the results and keep your outdoor space looking its best throughout the year.
Protect Your Investment and Enjoy the Results
Your outdoor space plays a big role in how your home looks and feels. In Florida’s climate, taking steps to protect that space isn’t just practical—it helps maintain the quality and comfort you’ve created.
Sealing your pavers is one of the most effective ways to keep them looking vibrant, performing well, and standing up to the elements over time.
If you’re ready to refresh your outdoor surfaces or want guidance on the best approach, you can always reach out to us. A knowledgeable team can help you explore options that suit your home and your lifestyle.


